Money Saving Tips: Laundry Detergent

Detergent IngredientsI have been reading Trent’s tips over at The Simple Dollar for a couple of years now, and I have to say that his idea of frugal and mine match up pretty nicely.  In general, it’s all about choosing what you want to spend money on and deciding what you want to spend your time on.  That being said, I must note that while I was fully (perhaps even over) employed, I never would have taken the time to make laundry detergent.  It wouldn’t have been worthwhile for me to spend the time hunting ingredients down in the grocery store and grating soap and mixing up a huge bucket of slime.  Not even at 15¢ a load in savings (which is about what Trent calculated).  With the five loads of laundry I do each week, that would put us at 75¢ in savings each week, or just under $40 a year.  Still wouldn’t have been worth it back then.

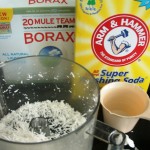
Now that I have long days to fill and since I’m working on this whole housewife thing, $40 a year is looking a lot better.  That’s nearly two free cases of beer at the local Costco, people!  And I’m talking the good, local, micro-brew stuff, not silver cans.  We must have priorities on what we spend those dollars on!  Besides, I was almost out of the detergent that I’d purchased months ago, so I figured it was time to give the homebrew method a try.  I followed Trent’s recipe pretty exactly, and I ended up this morning with a large bucket of slime, just like he promised.  I did my first load of laundry with it this morning, so I can tell you my thoughts.

I was concerned at first because the water didn’t get all bubbly when I poured the cup of detergent in.  I thought I might not have added enough, so I put a little more in and still no bubbles.  It did smell soapy though, and I decided to go for it.  For this experimental load, I had kitchen towels that were smeared with pesto remnants and tomato paste and such.  They would normally come out of my regular laundry detergent load without many stains (I don’t bother to pre-treat stains on my kitchen towels – if you take issue with stains on my dish towels, you probably shouldn’t come to my house).  I thought this would be a good test, and when I pulled the towels out of the washer, their stains were at least as gone as they normally would be.  However, they still kind of smelled like whatever they’d had on them before.  Not a ton, but I don’t want my laundry to have even the faintest whiff of its previous smell once it’s clean.  Don’t worry – all was not lost!

Before I started the laundry this morning, I gave the bucket a bit of a stir.  Trent says that there will be more solid globs floating in your detergent and not to worry about it, and that’s basically what mine looked like.  However, I hadn’t given the detergent a real stir, since I forgot to bring anything down to the laundry room that would be long enough to stir the bottom of the bucket.  I decided that I should try stirring it up a bit more, and found a layer of gelatinous goo on the bottom of the bucket.  So I stirred enough that the layer got dispersed throughout the bucket and threw another scoop into the machine.  The laundry came out with a complete lack of smell, and the stains were at least as clean as they would normally be.  This recipe seems to be a total success!

CSA Share August 31st

Pulled Chicken Sandwiches

So I was looking into what I could make for hubby that he’d really enjoy.  I’m trying this “housewife” thing, and it’s more difficult than I knew.  I always thought that I’d be able to have a hot dinner on the table if only I had more time.  But that was before I knew that Netflix has Veronica Mars, Season Two & Season Three on Instant View.  Here’s what I came up with for tonight: Pulled Chicken Sandwiches (based on the original turkey recipe found at Epicurious).  Because (if you’re new to reading this, you’ll soon find out) I have chicken.  I do not have pork.  I made some sandwich rolls recently too, and I’m hoping that I get extra dinner points to overcome the fact that I have no laundry points for this week.

Ingredients:

  • 1 large onion
  • 1 large garlic clove
  • 1 cup cider vinegar
  • 1 cup chicken broth
  • ½ stick unsalted butter
  • ½ cup ketchup
  • 3 tablespoons Worcestershire sauce
  • 2 tablespoons Tabasco plus additional to taste
  • ½ tablespoon (1½ teaspoons) salt
  • 1 tablespoon freshly ground black pepper
  • ¼ cup brown sugar
  • Boneless, skinless chicken breast (2 halves)
  • Accompaniment: soft sandwich rolls, toasted lightly if desired

Preparation:

  1. Finely chop onions and mince garlic.
  2. In a heavy saucepan, combine onions, garlic, vinegar, butter, ketchup, Worcestershire sauce, 2 tablespoons Tabasco, salt, pepper, and brown sugar and simmer, covered, stirring occasionally, 15 minutes. Add chicken breast, and cook at a bare simmer, covered, 2½  hours, flipping occasionally. After the first 2½ hours, begin to shred meat by smushing and crushing the breast apart (I didn’t actually take it out & pull it apart at all.  That probably makes me a bad southerner, but since I’ve only been south of the Mason-Dixon once, I don’t think that’s a surprise). Simmer barbecue, covered, over low heat, stirring occasionally, 1½ hours more and season with salt, pepper, and additional Tabasco.
  3. Serve barbecue on rolls.

Notes:

This version of the recipe is written with the “substitutions for boneless, skinless breasts” I found listed in the comments over at Epicurious.  If you look at recipes there, I highly recommend reading the comments.

The Verdict:

The sandwich rolls are lovely.  Hubby said that he liked the pulled chicken.  It was a little vinegar-y for me, but that might be mostly because of how I forgot to check on it a couple of times, and then the sauce was all cooked to goo and I used vinegar and ketchup and chicken stock (but a lot of vinegar) to create more liquid.  He said that he likes a vinegar-y barbecue, so maybe that’s what he liked about it.  Anyway, it’s worth keeping in the recipe file.  We had a small container of leftovers that worked well for lunches during the week, so if I scale back the vinegar (and remember to check on it between everyepisode of Veronica Mars, not just some of the time), it will probably become a good go-to recipe.

Another Visit to Flour Tortillas

Little update on the flatbread project: there’s likely to be a lot more about flatbreads here. I’m working on perfecting the process of making every flatbread from every culture. As long as I can use my Cuisinart or KitchenAid, of course. I’m feeling really good about pizza crust and pita breads, and I’m on the verge of getting tortillas just how I want them. Next up will be corn tortillas, but then likely naan, just because I love it. My father mentioned lavash, and Ethiopian flatbread (whatever that’s called), and apparently there’s a sweet version from Norway… But I’m not moving on until I have a flour tortilla I can count on.

Which is why I re-tried that flour tortilla recipe from The Weekend Gourmande.  I (of course) converted it to the Cuisinart and tried cooking it with the newfound knowledge I gained from Pioneer Woman.  This time, the tortillas came out just the right color.  They had a lacing of golden brown on one side and spots of dark brown on the other.  These are a bit thicker than the lard-version, and I don’t know how well they’ll hold up as burritos because of that factor.  However, they cooked up beautifully and I’m considering how they would work with an extra step of rolling them out just before cooking.  Yes, that would mean that I’m resting the tortillas 3 different times, in 3 different shapes in the recipe.  But the alternative is driving to BONNEY LAKEfor one ingredient.  I’m only really lazy when it involves going out in public.  And mixing things by hand.  And housework.  Other than that, I have dogged determination that will see me through this flatbread experiment.  I’m quite looking forward to it.

Update: I now have my ultimate tortilla recipe, which is what I recommend using if you decide you want to make your own homemade tortillas!

Pita Bread

I found the original for this recipe at greekfood.about.com, and I like how it turns out. It took some experimentation to find the pita recipe we were really interested in eating.  We love pita bread as a flat bread, not as a pocket bread so much (although sometimes these will inflate and create pockets as well).  Our breads are a little thicker than the pocket breads usually are (1/4″ – 3/8″ or so) and are perfect to use for dipping in hummus or heating up with feta on top.

Ingredients:

  • 1 tablespoon active dry yeast
  • 1 tablespoon of sugar
  • 1/2 cup of warm water
  • 4 cups of bread flour
  • 2 teaspoons of salt
  • 1 cup of warm water
  • 1 tablespoon of olive oil

Preparation:

  1. Dissolve in the yeast and sugar in ½ cup of warm water and set aside, covered, for 15 minutes. Dissolve salt in the remaining 1 cup of warm water.
  2. Put flour in the bowl of an 11-Cup Food Processor.  Pulse briefly to settle the flour.  Continue pulsing while adding yeast mixure and salt water in a steady stream.  Continue pulsing until dough forms, then turn food processor on for 30 seconds or so.  Add olive oil and continue to process until all oil is absorbed.
  3. Shape into a ball, place in 8-cup measure, cover tightly with plastic wrap, and place in a warm area to rise until doubled in volume, approximately 1 1/2 to 2 hours. Punch down the dough and knead briefly.
  4. Preheat oven to 350°F (175°C), and tear commercial-sized parchment paper in half.
  5. Take pieces of dough slightly larger than an egg and roll out on a floured surface to a thickness of 3/8 to 1/4 inch. (For larger or smaller pita bread pieces, take more or less dough). Prick the bread with a fork in several places and brush lightly with olive oil.
  6. Place on parchment paper and bake at 350°F (175°C) on the lowest oven rack for 2-3 minutes, then turn the pitas over and bake for another 2-3 minutes. Remove from oven and place on another sheet of parchment paper , with a clean towel on top. When thoroughly cooled, pitas can be stored in plastic bags in the refrigerator, or frozen.
  7. Before using, brown in a lightly oiled skillet for a few minutes until browned on both sides or re-heat briefly in the oven.

The Verdict:

We love these pitas.  I made a whole mess of them (I think it was three recipes or more) recently to take on family vacation with us.  They’re absolutely wonderful.  They’re good used to make pita sandwiches, used as thick wraps, or cut into wedges to eat with dip.  You may have noticed that the technique I use for these pitas is pretty much the same as the technique I use for pizza crust.  That’s just because I’m really lazy.  And I don’t enjoy mixing any kind of dough by hand.  If it can’t be made in a Cuisinart or KitchenAid, I’m not likely to cook it.  Luckily, most recipes can be adapted to one contraption or another.

Flour Tortillas – Take II

My good friend thought I would like Pioneer Woman (how well she knows me!) and I spent some time this afternoon checking out what look to be amazing recipes.  I was just browsing through until I came to a recipe for homemade flour tortillas.  Anyone who has read anything on this site knows how I love my flatbreads!  I tried flour tortillas a few months ago, but found that the ones I was making didn’t turn out how I’d hoped.  It turns out that Pioneer Woman has a recipe using lard.  I’ve never used lard before to my knowledge, but it sounds like just the thing to add flexibility and chewiness to my flour tortillas.  Of course, the original recipe involves things like stirring and bowls, so I’ve adjusted the whole thing to the Cuisinart.  I’m sure you’re all shocked.  Here’s me giving it a go!

Ingredients:

  • 2-½ cups All-purpose Flour
  • 2-½ teaspoons Baking Powder
  • 1 teaspoon Kosher Salt
  • ½ cups Lard Or Vegetable Shortening
  • 2 Tablespoons (additional) Lard Or Vegetable Shortening
  • 1 cup Hot Water

Preparation:

  1. Combine flour, baking powder and salt in the bowl of a food processor with a few pulses.
  2. Add spoonfuls of lard or shortening (use ½ cup PLUS 2 tablespoons), then pulse briefly again to combine the ingredients. The mixture should resemble coarse crumbs.
  3. Slowly pour hot water through feed tube, pulsing to bring mixture together until it becomes a cohesive ball of dough. Cover with a tea towel and allow dough to rest for at least an hour.
  4. Roll into ping pong size balls, place on a piece of parchment paper, cover with a towel, and allow to rest for another 20 to 30 minutes.
  5. When you’re ready to make the tortillas, heat a shallow skillet to medium/medium-high (which is 7.5 on my electric stove that goes to 8 and then HI).  Be sure to allow your pan to fully heat, or you’ll think it’s too cool and then you’ll turn it up, and then you’ll burn some…
  6. One by one, roll out balls of dough until very, very thin. Throw tortillas (one by one) onto the  skillet. Cook on each side for 20 to 30 seconds, removing while tortillas are still soft but slightly brown in spots. Remove and stack tortillas, and cover with a towel to keep warm. Serve immediately or allow to cool before storing tortillas in a container.

Pioneer Woman also has these Helpful Tips:

* Make sure the water you pour in is very warm.
* Allow the dough to rest, both after kneading and after forming into balls.
* Roll out very thin.
* Get the heat right on your stove: Too hot, and the tortilla will burn in spots. Not hot enough, and the tortilla will begin to crisp before you can get it to brown. I get my stove between medium and medium high heat; that seems to do the trick.
* Use a dark griddle or cast iron skillet to brown the tortillas.
* Cook just long enough to lightly brown the tortilla in spots; don’t cook too long or tortillas will crisp. You want them to be soft and pliable when you serve them.
* Finally: Have fun! And enjoy them. They’re absolutely scrumptious.

The Verdict:

These are really wonderful.  Hubby loved them.  I loved them.  They had a strange texture when we used them to make our normal tacos.  Instead of getting hard and crispy and weird, they were instead still pleasantly soft.  I don’t know if that’s the lard or the fresh-cooked aspect, but I’m calling it a “win” for now.  Now that I’ve figured out the intricacies of actually cooking the tortillas, I’m going to have to try the other recipe again.  Not that I have anything specifically against lard, but it’s difficult to find in our city.  And then it is partially hydrogenated, when the entire point of lard (for me) is to avoid the trans-fats (and stick with the regular fats only).  There’s apparently a butcher in Bonney Lake that makes their own lard, but since I can’t seem to get myself to the store to buy bacon, going a few towns over for lard seems…  let’s go with unlikely.  We’ll see.

Update: I now have my ultimate tortilla recipe, which is what I recommend using if you decide you want to make your own homemade tortillas!

Blue Cheese Dressing

This is strongly based on the America’s Test Kitchen Family Cookbook recipe, and we make it enough that I’ve stopped measuring.  This is something I always like to have on hand during the early season of the CSA (when we have lettuce every week and there’s always something I enjoy raw, dipped in dressing).  This week, I enjoyed this as a dip for kohlrabi, snap peas, celery, and even as salad dressing (on salad – crazy, I know)!

Ingredients:

  • 3 ounces (or so) blue chees
  • 2-3 cloves fresh garlic
  • generous ¼ cup buttermilk
  • generous ¼ cup sour cream
  • scant ¼ cup mayonnaise
  • pinch sugar
  • splash vinegar (white wine vinegar is recommended, but as long as you don’t mind a brown tint or red tint to your dressing, balsamic or red wine vinegar will both work as well).
  • salt & ground black pepper to taste

Preparation:

  1. Mince garlic or put through a garlic press.
  2. In a small bowl, combine blue cheese, garlic, and buttermilk.  Mash together with a fork until the mixture has a cottage cheese-like consistency.
  3. Add remaining ingredients and mix together.
  4. Use as a dip or to top salad.

The Verdict:

What I love about this recipe is the extra bite that comes from the fresh garlic as well as the tang from the buttermilk.  Although many grocery store brands of blue cheese dressing are overly heavy on the mayonnaise taste, this recipe includes both buttermilk & sour cream to round out the flavor.  I really dislike being able to taste the mayonnaise, so I go easy on that part and then increase the sour cream.  I love this recipe, and I’ve even added buttermilk to our milk delivery schedule so that I never have to run to the grocery store for buttermilk to make this recipe happen.  I do have to figure out how to make buttermilk pancakes or biscuits or something though, since I don’t like the taste of buttermilk by itself and I don’t ever use up the whole carton before it goes bad.

Slow Rise Pizza Dough

It’s so easy to turn most things into a meal just by cooking them on top of a pizza crust.  Plus, if we’ve eaten creative pizzas for a couple of days, I usually only have plates and cutting boards to wash (instead of piles of pots and pans and prep bowls).  I think I’ve fully converted to this slow-rising recipe; the first time we tried it, I thought I might go crazy because the dough just wouldn’t change shape as I tossed it.  It took 5 minutes to get a dough ball ready for the oven instead of 2.  I was hungry and this was slowing up my dinner!  However, I soon realized that the crust shapes we were making were much better than normal.  The dough wasn’t getting brittle and thin in the middle, even after many minutes of tossing.  And then the flavor was lovely as well.  I read somewhere that recipes using less yeast with a longer rising time develop a more complex flavor.  Add to that the fact that the dough rises for 6-8 hours on the counter and can rest in the refrigerator for up to 16 hours before that.  This means that I can start the dough up to 24 hours before I’m ready to make pizza!

Ingredients:

  • ½  cup warm water (about 110 degrees)
  • ½  teaspoon yeast
  • 1¼  cups water, at room temperature
  • 2 tablespoons olive oil (plus more for oiling the bowl and brushing the top)
  • 4 cups (22 ounces) bread flour, plus more for dusting the work surface and hands
  • 1½  teaspoons salt

Preparation:

  1. Measure the warm water into a 2-cup liquid measure.  Sprinkle in the yeast and let stand until the yeast dissolves and swells, about 5 minutes.  Add the room-temperature water and oil and stir to combine.
  2. Process the flour and salt in an 11-Cup Food Processor, pulsing to combine.  Continue pulsing while pouring the liquid ingredients (holding back a few tablespoons) through the feed tube.  If the dough does not readily form into a ball, add the remaining liquid and continue to pulse until a ball forms.  Process until the dough is smooth and elastic, about 30 seconds longer.
  3. The dough will be a bit tacky, so use a rubber spatula to turn it out onto a lightly floured work surface.  Knead by hand for a few strokes to form a smooth, round ball.  Put the dough in an 8-cup measure and cover with plastic wrap.
  4. At this point, you can put your dough in the refrigerator for up to 16 hours.  When you’re ready to proceed, continue with step 5.
  5. Leave covered dough on the counter and let rise until doubled in size, 6 to 8 hours.  I use the 8-cup measuring cup because it’s really easy for me to see when the dough is done rising.  Press the dough to deflate.
  6. Place a pizza stone on a rack in the lower third of the oven.  Heat the oven to 475 degrees for at least 30 minutes.  Turn the dough out onto a lightly floured work surface.  Use a chef’s knife or dough scraper to divide the dough into four pieces.  From each piece of dough into a smooth, round ball and cover it with a damp cloth.  Let the dough relax for at least 10 minutes but no more than 30 minutes.
  7. Spread a large piece of parchment paper on the counter for shaping and transporting the crust.  Working with one piece of dough at a time and keeping the others covered, flatten the dough ball into a disk (thicker at the center) using the palms of your hands.  Using a combination of stretching the dough on the counter and tossing the dough, shape each of your dough rounds into a flattened pizza shape (more detailed instructions here).  Prick the dough in several places with a dinner fork.
  8. Lightly brush the dough round with olive oil.  Slide the dough onto the heated stone.  Bake the pizza for 2 minutes.  Remove the pizza from the oven, cool on the counter for 30 minutes or so, and wrap with plastic wrap to store.  While the first pizza crust is cooking, you can shape the second crust (with practice).
  9. Par-baked crusts will last for up to a day on the counter, up to a week in the refrigerator, or for up to two months in the freezer (wrapped in plastic wrap AND foil).  When you are ready to prepare a pizza, make the sauce.  Since the pizza will already be par-baked, you’ll put the sauce, pepperoni, and cheese on all at the same time, and bake until the cheese is bubbling and starting to brown.

Flour Tortillas from Scratch

  Adapted from the weekend gourmand, who adapted from Homesick Texan

Makes 16 tortillas (if you’re going to the trouble of making these from scratch, don’t just make 8–you can save whatever you don’t eat right away for the next day or two)

So the problem I see with the recipe as written is that I have to be way too involved in the whole mixing and kneading thing.  My favorite pizza dough and pita bread recipes happen almost entirely in the Cuisinart.  I’m an appliance kinda girl (at least when it comes to baking).  So I’m trying this tortilla thing adapted to theCuisinart.  One of the notes that the ladies at the weekend gourmand said was that they thought they might have over-handled the dough.  The Cuisinarttakes the guess-work out.

Ingredients:

  • 4 cups all-purpose flour
  • 3 tsp baking powder
  • 2 tsp salt
  • 1½ tablespoons vegetable oil
  • 1½ cups warm milk

Preparation:

  1. Add dry ingredients to food processor bowl and pulse briefly to mix. Slowly add warm milk and oil through the feed tube while pulsing until it comes together. Process for 30 seconds longer.  Turn out onto the counter and knead for a few strokes until it’s smooth, shiny and soft. Place in a bowl, cover with a towel or plastic wrap and let rest for 20 minutes.
  2. After resting, turn the dough out again and divide it into sixteen equal pieces, rolling them into balls and then setting them onto a piece of parchment paper to rest. Cover with a damp towel again and let rest another 10 minutes.
  3. Flour your work surface, then take one dough ball at a time and flatten it with your hands into a circle. Then, using a rolling pin, roll out the dough into a thin disc, picking it up and rotating and flipping it every 5 or so rolls so that it stays even like you would a pie crust. Here is where you are supposed to avoid overworking the dough.  While you’re rolling out the rest, cover the finished ones with the towel (you can stack them up without worrying about them sticking, at least in my experience).
  4. Preheat a dry griddle to medium high heat.  Cook tortillas for about 30 seconds per side or until they’re getting lightly browned, and cover the finished ones with a towel while you finish the rest. Enjoy!

The Verdict:

Hubby & I made a whole mess of these, trying to perfect the recipe in our kitchen.  Unfortunately, there isn’t a setting on our griddle that cooks at a high enough temperature to get brown spots in less than a minute on each side.  While these were still tasty, they didn’t compare to my favorite store brand tortilla.  I’m contemplating purchasing cast iron just for this recipe.  Hubby says he likes cooking with cast iron anyway, so we might break down and buy some.  Until then, I’ll keep buying tortillas at the store.

Update: I now have my ultimate tortilla recipe, which is what I recommend using if you decide you want to make your own homemade tortillas!

Limey Cabbage

We get cabbage quite often in the CSA, and I didn’t used to be a cabbage person.  I never understood why folks wanted cabbage instead of lettuce on their fish tacos.  I don’t like coleslaw.  I don’t like cooked cabbage – blech!  Limey Cabbage is pretty much the only way I really like to eat cabbage. Now, this is where Hubby and I differ.  He loves cabbage.  He’ll eat it raw, he’ll eat it steamed.  He told me once that he almost ate the cabbage from our CSA share on the way home from picking it up, like an apple.  The only thing that stopped him was the fact that he needed to take a photo for this blog.  One day, in a huge display of matrimonial support, I will actually prepare corned beef and cabbage for him.  Then he will die of shock and surprise.  But he will have died happy.

The thing about how much Hubby loves the cabbage is this:  unless I’ve told him that he has to fend for himself for a meal, he won’t think of making anything.  And even if I’ve told him he needs to feed himself, it’s far more likely to be cereal than anything that requires preparation.  Even the day that he was tempted to eat the cabbage on the way home, he then put it into the refrigerator and forgot about it until I pulled it out to make this recipe.

So this Limey Cabbage recipe is what I’ve found to use cabbage in a way that I’ll actually eat it.  One day, I came across this recipe on Epicurious, and I’ve developed it into the wonder you see below.  Enjoy!

Ingredients:

  •  cabbage – this can be red, green, Chinese, whatever you want (or happen to have on hand).
  • leaves from ½ bunch of fresh cilantro
  • 1 lime
  • 3 tablespoons olive oil
  • salt & pepper to taste

Preparation:

  1. Slice your cabbage into a nest of thin, squiggly bits and combine with cilantro leaves in medium bowl.
  2. Zest your lime (directly into the same bowl) and make it all cool and stripey looking.
  3. Juice your lime into the same bowl and add olive oil and salt & pepper.
  4. Toss your limey cabbage and it’s ready to serve as a component in tacos or burritos, or as a side salad.

The Verdict:

We’ve made several variations on this recipe; when we’re out of cilantro, it’s just cabbage in a lime/olive oil dressing.  When we have bell peppers that need to be used, we throw them in.  It’s a pretty forgiving base for getting some tasty veggies into your tacos.  We’ve always used it as a taco topping, but my cousin’s son loves it on its own, just as salad.  I guess that’s not surprising, since both her children ask if they can eat the lime pulp after I’ve squeezed the juice for the recipe…